FAQ
Please also see the FAQ page for answers to some frequently asked questions.
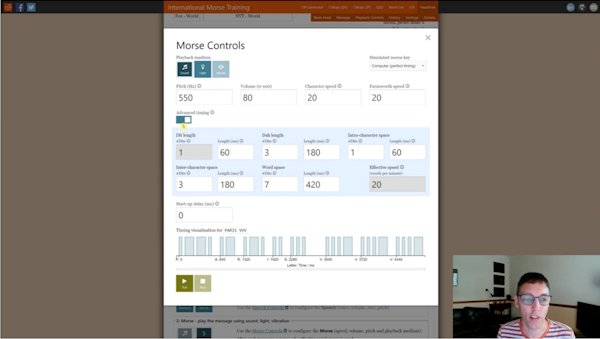
Morse Controls (Timing)
Understanding how to control the timing of the generated CW is important. All the tools are completely flexible in this regard. Please see the video below to understand what “Character Speed” and “Farnsworth Speed” are and how to use the features in the Morse Controls pop-up.
If you’re interested, I’ve written up some of the maths behind the Character, Farnsworth and Wordsworth speeds.
Videos
I and others have created a number of videos to explain the features of the tools. The videos embedded in the tools, and some others can be found in my Vimeo channel. I've collected together various helpful videos authored by others in my YouTube channel.
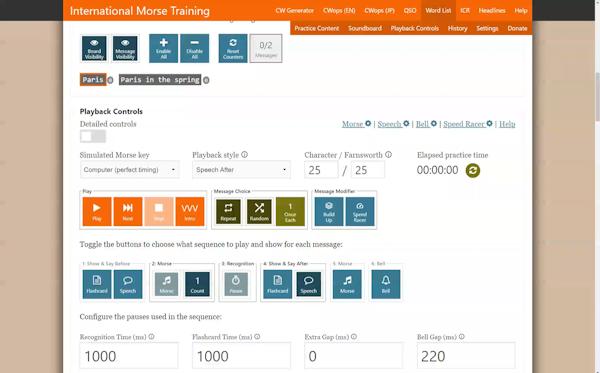
Playback Controls
Most of the tools follow the same pattern: select the content you want to practise (whether characters, words, QSO, headlines, etc) then set up the Playback Controls to play the content in the style that you want. The playback controls are complicated though!
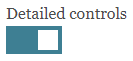
The Playback Controls interface can be toggled between a detailed view with lots of additional help and embedded timing controls, or a summary view for when you know what you want. The view is changed using the “Detailed controls” toggle:
Playback Style
To make things simpler, some preset “Playback styles” are included.
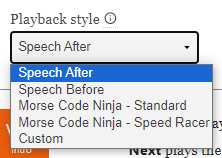
The sequence for each is as follows:
- Speech after: play Morse once, speak the message
- Speech before: speak the message, play Morse once
- Morse Code Ninja – Standard: play Morse twice, speak the message, play the Morse again, bell sound
- Morse Code Ninja – Speed Racer: play Morse four times (gradually descreasing the character speed), speak the message, play the Morse again (at top speed), bell sound
- LICW OverLearn Flow Rate 1: designed for the LICW OverLearn curriculum, 27 WPM
- LICW OverLearn Flow Rate 2: designed for the LICW OverLearn curriculum, 31 WPM
All the preset styles turn on “Repeat” so that you get a continuous stream of messages. The two “Morse Code Ninja” styles copy the style of the superb pre-recorded resources available on the Morse Code Ninja website.
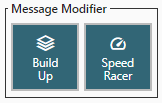
Message Modifiers
Some tools have one or two optional “message modifiers” which can be used to modify the Morse that you will hear in step 2 of the playback sequence. The modifiers are “Build Up” and “Speed Racer”.
More information on these can be found below.
Build Up
The “Build Up” modifier was suggested by Glenn, W4YES. It works differently depending on whether the message is a word or phrase:
- A word will be built up letter by letter, so NICE is played as N NI NIC NICE.
- A phrase will be built up word by word, so UP WE GO is played as UP UP WE UP WE GO
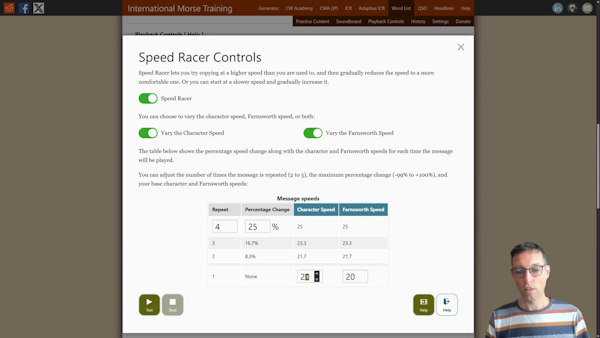
Speed Racer
The “Speed Racer” modifier is based on the Morse Code Ninja material of the same name. By default it boosts the initial speed by 50% and then repeats the message, stepping down the speed a few times to your chosen values. The Morse Repeat (in step 5) will play at the modified speed if it is selected. There are many options related to the Speed Racer modifier and these are found in the Speed Racer control pop-up. You can choose there whether to vary the character and/or Farnsworth speeds, how much to vary them by, and how many times to play the message. If you want to, by using a negative percentage, you can even reverse the order so that the message starts slow and speeds up!
Playback Sequence
For each “message” that is played (e.g. QSO, headline, word, phrase), the sequence defined by six numbered stages is followed. Adjusting the settings lets you choose what you hear and see for each message.

- Show & Say Before: the Flashcard and Speech buttons let you have the message spoken and/or see a flashcard before you hear the Morse. You can choose the (minimum) duration of the flashcard with the Flashcard Time setting.
- Morse: this one is mandatory! The message will be played in Morse code using the Morse Controls settings (for sound, light, vibration and timing). Note: it is only in this part that the timing set in “Morse Controls” has any effect. Use Count to choose how many times it plays (1 to 5) or have it repeat until you press the Next button.
- Recognition: you are able to choose how long you need to recognise the Morse you have heard before moving on: the Recognition Time. The button cannot be deactivated: instead set the Recognition Time to zero.
- Show and Say After: just the same as step #1 but occurs after the Morse.
- Morse: if you want a reminder (now you know what it is) then enable this.
- Bell: turn the bell on to clearly indicate that the sequence for that word is finshed and that you should get ready for the next one.
Settings Import/Export
All the settings in a page are stored locally in your web browser, so if you close a page and then come back to it, everything should be how you left it. You can use Save Settings to save your settings into a file (in JSON format, so you can load it in a text editor) which you could provide to a class or send to a friend for them to upload with the Upload Settings button.
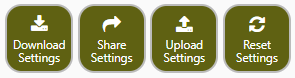
Clicking on the Share Settings button generates a really long URL (“rich link”) which encodes all the settings. It then opens your operating system’s “Share” system (different on phones and desktop) which allows you to copy the link (at minimum) and may also let you share the link on social media for instance. The link also appears in the page with a button to copy it:

Again, sharing such a link with a friend or with a class is a good way to ensure that you all have the same set-up. Instructors might like to embed these rich links into their instruction documents so that students may load the tool with all the settings correctly set. For example, the following link (abbreviated for display) will open the ICR trainer with the letters of CW Academy session 1 selected, set to generate sentences of three 3-letter words, with the “Speech After” playback style selected and 20/15 speed: https://morsecode.world/international/trainer/character.html?settings=eyJJQ1I...xIU0yJHGkcqtOsaUfX0K
To make things even easier for students, an instructor might like to append “#playback” to a rich link and the tool will open with the Playback Controls already scrolled into view.
Finally, if you get your settings in a mess, you can use the Reset Settings button to set everything in the page back to its default value.
Tag Format
Used in CW Generator and Word List Trainer
It is possible to control and change the timing and pitch using “tags”. The tags change parameters within a single message, work relative to the initial values and do not affect the user’s settings. For example (click on the tiles to listen):
- Timing:
- Set the character and Farnsworth (“effective”) speeds to 30 wpm: VVV [t30]VVV
- Set the character speed to 20 wpm and Farnsworth speed to 10 wpm: VVV [t20/10]VVV
- Add 5 to the user’s character and Farnsworth speeds: VVV [t+5]VVV
- Add 20% to the user’s character speed and subtract 5 from their Farnsworth speed: VVV [t+20%/-5]VVV
- Set the Farnsworth speed equal to the current character speed: [t=]
- Reset the character and Farnsworth speeds to the initial values: [t]
- Extra spacing:
- Include 3 word-spaces: V[ ]V
- Pause for 500ms: V[500]V
- Pause for the duration of the text “abc”: V[d:abc]V
- Pitch (using “p” or “f”):
- Change to absolute value: V[p400]V or V[f400]V
- Adjust by -50Hz relative to the main setting: V[p-50]V
- Increase by 10% relative to the main setting: V[p+10%]V
More documentation about the tag format is available in the morse-pro library source code.
CW Academy Morse Code Trainer
The CW Academy Morse Code Trainer is designed to help students learn the characters of the Morse code alphabet. It is used in the CW Academy beginner training program.
Practice Content
The “Practice Content” section lets you choose what messages you will practice:
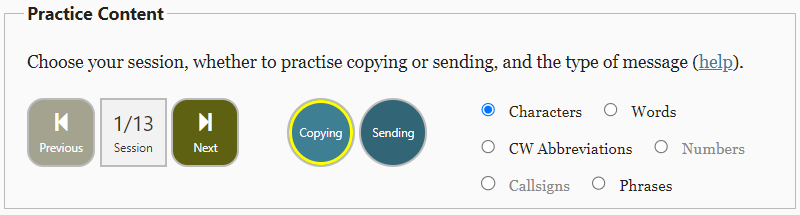
The “Session” number (with left and right arrows) refers to sessions 01 to 13 in the CW Academy’s Beginner CW training program.
The “Copying” and “Sending” buttons pre-set program parameters for either copying or sending practice.
There is a choice of six types of message (though not every type is found in every session):
- “Characters” can be letters, numbers, punctuation, or pro-signs based on the session chosen.
- “Numbers” will be from 0 to 9 based on the session chosen.
- “Words”, “CW Abbreviations” and “Callsigns” are composed of the Characters based on the session chosen.
- “Phrases” are short sentences composed of the characters and words based on the session chosen.
Message
The current message is placed into the “Message” box.
- “(Show)” will display the message that is being played.
- “(Hide)” will mask (gray out) the message being played.
Word List Trainer
Practice Content
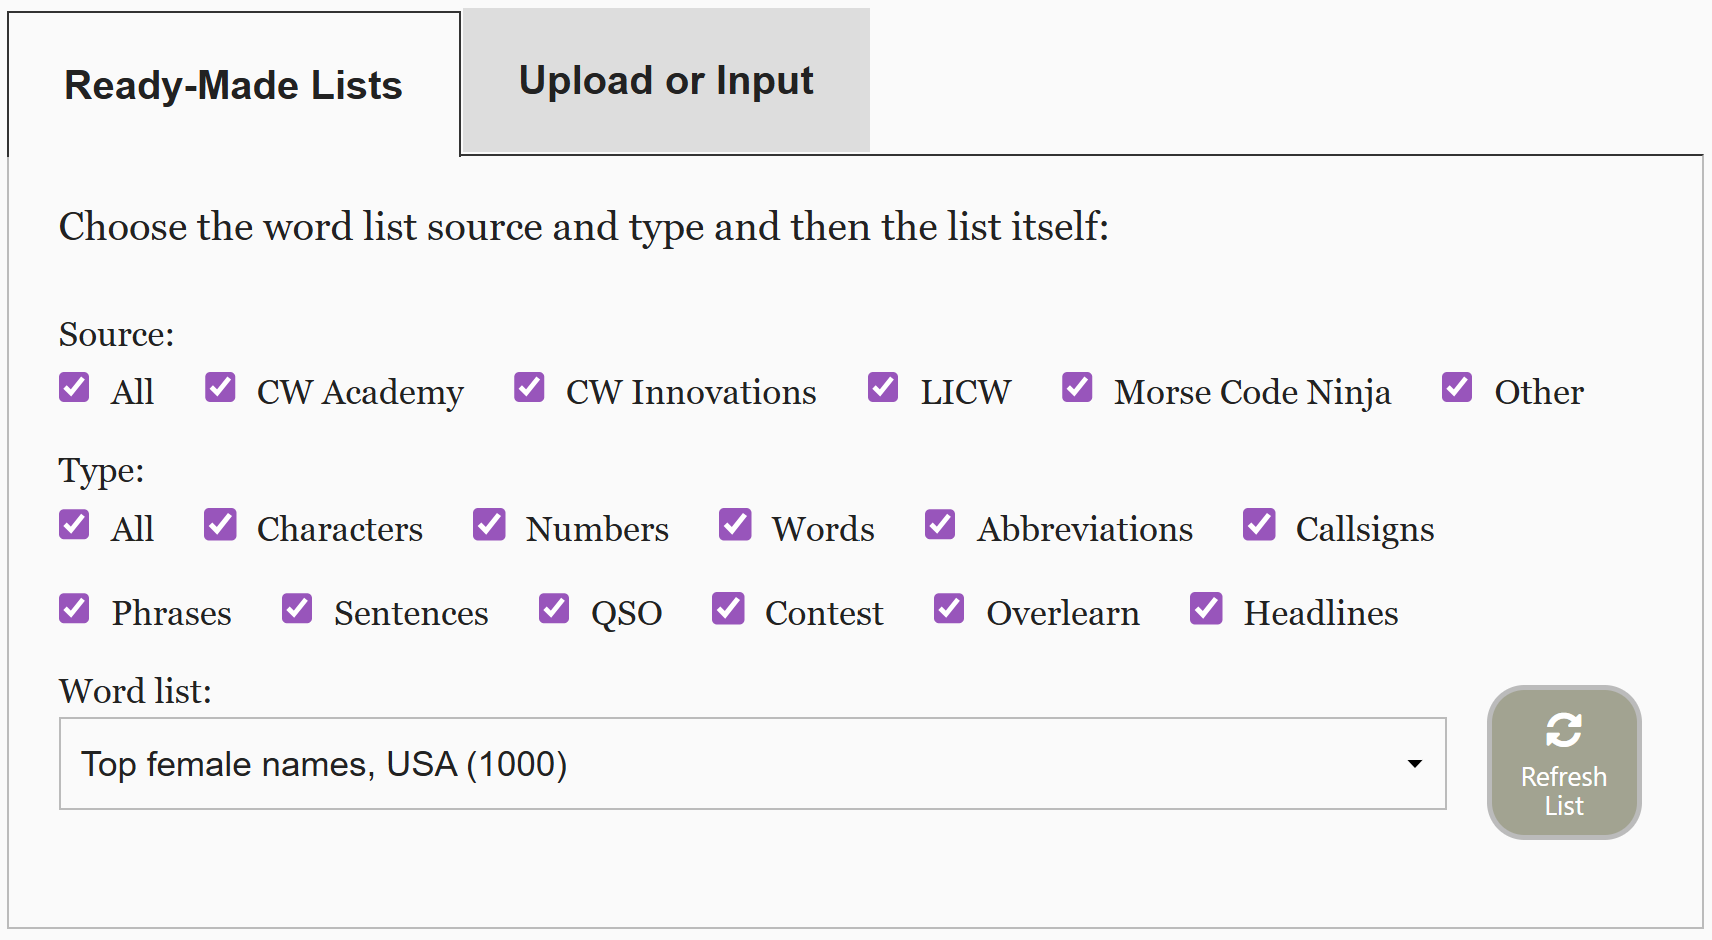
Ready-Made Lists
There are over 180 word-lists provided for you to practise. You can just choose one from the drop-down list and it will be loaded. To help find the content you need, you can choose which source(s) and content type(s) to show by selecting/deselecting some of the checkboxes.
Upload or Input: Custom Word Lists
As well as choosing from the ready-made word lists, you can upload, type, drag & drop, or paste in your own lists using the “Upload or Input” tab of the “Practice Content” area (see screenshot below).
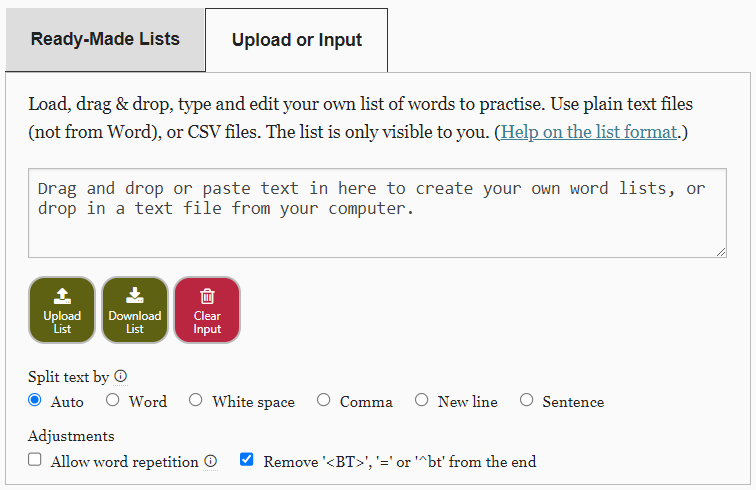
The software needs to know how to extract “words” (or messages) from the input, so the “Split text by” option lets this be defined:
- Auto: guess how to split the input file
- Word: extracts words and removes most punctuation
- Whitespace: splits the input at all whitespace characters (new lines included)
- Comma: splits the input at commas (including surrounding spaces)
- New line: splits at any combination of new-line characters
- Sentence: splits after a period (full-stop)
There are then two “Adjustments” that can be made to the interpretation of the input.
- The option “Remove line endings ('<BT>', '=', '^bt')” is useful if you are uploading a word list prepared for other software where each line of the file is a word/message and the lines end with one of “<BT>”, “=” or “^bt”. With the option checked, any of these will be ignored.
- The second set of options allow control over the punctuation in the messages, removing all, some, or none of it from the input text.
Defining Morse, Speech, Display and Repeat
A powerful feature of the software is that you can define the following four things separately:
- the message to play in Morse code (sequence step 2);
- what should be spoken;
- what should be displayed (in the tile and flashcard); and
- the message to play if the Morse repeat option (sequence step 5) is activated
This ability is used in the ready-made “USA state abbreviations” list where the first line (for example) is {AK|alaska}. This means play and display “AK” but speak “alaska” (if speech is selected). The format options are:
{text|speech}: text will be used for display, the Morse code, and the Morse repeat. speech will be used for speech{text|speech|display}: text will be used for the Morse code, and the Morse repeat. speech and display will be used for the speech and display{text|speech|display|repeat}: text will be used only for the Morse code (sequence step 2) with speech, display and repeat being used for the speech, display and repeat respectively
This extended format can be combined with the tag format, for example:
{[t+50%]hello[t+25%]hello[t]hello|hello|hello|[t+50%]hello}would play the Morse for “hello” in sequence step 2 three times (50% faster, 25% faster, then at the user’s speed), would say and display “hello”, and would play “hello” in Morse 50% faster than the user’s settings in sequence step 5.{[t+50%]hello[t+25%]hello[t]hello|hello|hello|[t+50%]hello}would play the Morse for “hello” in sequence step 2 three times (50% faster, 25% faster, then at the user’s speed), would say and display “hello”, and would play “hello” in Morse 50% faster than the user’s settings in sequence step 5.
Defining what is displayed separately to the Morse can help in some cases, such as:
{KEF FSK JE GY KN|hello|안녕하세요.}would play the Korean (SKATS) Morse for “hello”, say “hello” (in English), and display the Korean “안녕하세요.”
Optional Message Filters
To help you focus in on what you want to practise, such as your problem characters, there are a range on filters which pick out a subset of the messages from the chosen list:
- Characters that you know: the idea here is to input all the characters that you know - messages including other characters will not be included in the soundboard;
- Characters that you want to practise: only messages including one or more of these characters will be included in the soundboard;
- Message length: choose the range of the length of messages to include;
- Only messages with double letters: as double letters can be tricky, this filter will pick out just those messages;
- Sometimes the input text may include the same word more than once (particularly if you paste in a story or article). If “Allow word repetition” is not ticked then each word from the input will only be shown once in the soundboard. If it is ticked then words will appear in the soundboard potentially multiple times, reflecting their occurrence in the input text.
Play Options
The “Play Options” controls in the Word List Trainer are more complex than the other tools. They change how and when the next message/word from the chosen list is played.
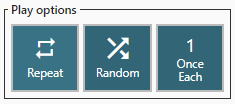
- Repeat: cycles through no repeat / continously play new messages / repeat the current message.
- Random: rather than playing the messages in list-order, choose the next one randomly.
- Once each: when the message is chosen then with Once each set, only messages that have not been played will be chosen.
Selecting all three buttons will mean that all messages will be played once in random order.

 │
│